
How to Write a Method Statement (UK) with Example
If you've ever had a job held up because a principal contractor rejected your paperwork, you know how frustrating a method statement can be. You probably know the job well. The hard part is knowing how to write a method statement that gets that knowledge onto paper in a form someone else can follow.
This guide walks you through what a method statement is, when you need one, the sections it should contain, and a full worked example for a typical small job. There's also a copy-paste template you can use today, a list of common mistakes that get RAMS sent back, and answers to frequently asked questions.
A method statement is a written, step-by-step description of how a job will be carried out safely: the sequence of work, the people, the equipment and materials, and the controls at each stage. To write one, cover ten sections, from project and site details to sign off and review, and make every entry specific to the site. In Great Britain, the law usually does not require a document called a method statement, but clients and principal contractors often ask for one. The law does require written arrangements for demolition or dismantling and a written plan of work for any work with asbestos, and HSE says the arrangements for structural alteration must also be recorded in writing.
What Is a Method Statement?
A method statement is a written, step-by-step description of how a job will be carried out safely. It sets out the sequence of work, the people involved, the equipment and materials needed, and the control measures that keep everyone safe at each stage.
Think of it as the "how" document. It tells anyone reading it (a site manager, a principal contractor, a new starter on your team) exactly what happens first, second, third, and so on, and what precautions are in place at each step.
Method Statement vs Risk Assessment: What's the Difference?
The two documents do different jobs:
- A risk assessment identifies the hazards of a job (falling, electric shock, dust, manual handling) and rates how likely and how severe each one is, then lists the controls that reduce that risk.
- A method statement takes the controls from the risk assessment and builds them into the actual sequence of work. It answers "what do I do, in what order, and how do I stay safe while doing it?"
In practice, the two documents are usually used together and bundled as "RAMS" (Risk Assessment and Method Statement). Your risk assessment says raking out mortar creates silica dust that needs on-tool extraction and a dust mask (RPE). Your method statement says at which step the extraction is fitted and the mask goes on. If the two don't match, an inspector or principal contractor is likely to notice, and your RAMS may be sent back.
When Will a Principal Contractor Demand One?

Before you start on a managed site, your RAMS may be checked closely.
You'll usually need a method statement whenever:
- You're working on a site controlled by a principal contractor under the Construction (Design and Management) Regulations 2015 (CDM 2015), even for small jobs
- The work is higher risk, such as working at height, hot works, excavation, confined spaces, asbestos-containing materials, or lifting operations
- You're a subcontractor or sole trader working alongside other trades on a shared site
- Your client's insurer, housing association, or local authority requires documented evidence of safe systems of work before you start
- You're tendering for commercial or public sector work, where RAMS are often requested as part of the pre-qualification paperwork
On domestic jobs, some clients and letting agents also ask to see a method statement before work begins. Being asked for one is not the same as the law requiring one: the legal position is set out in the FAQ below.
How to Write a Method Statement: The 10 Sections to Cover
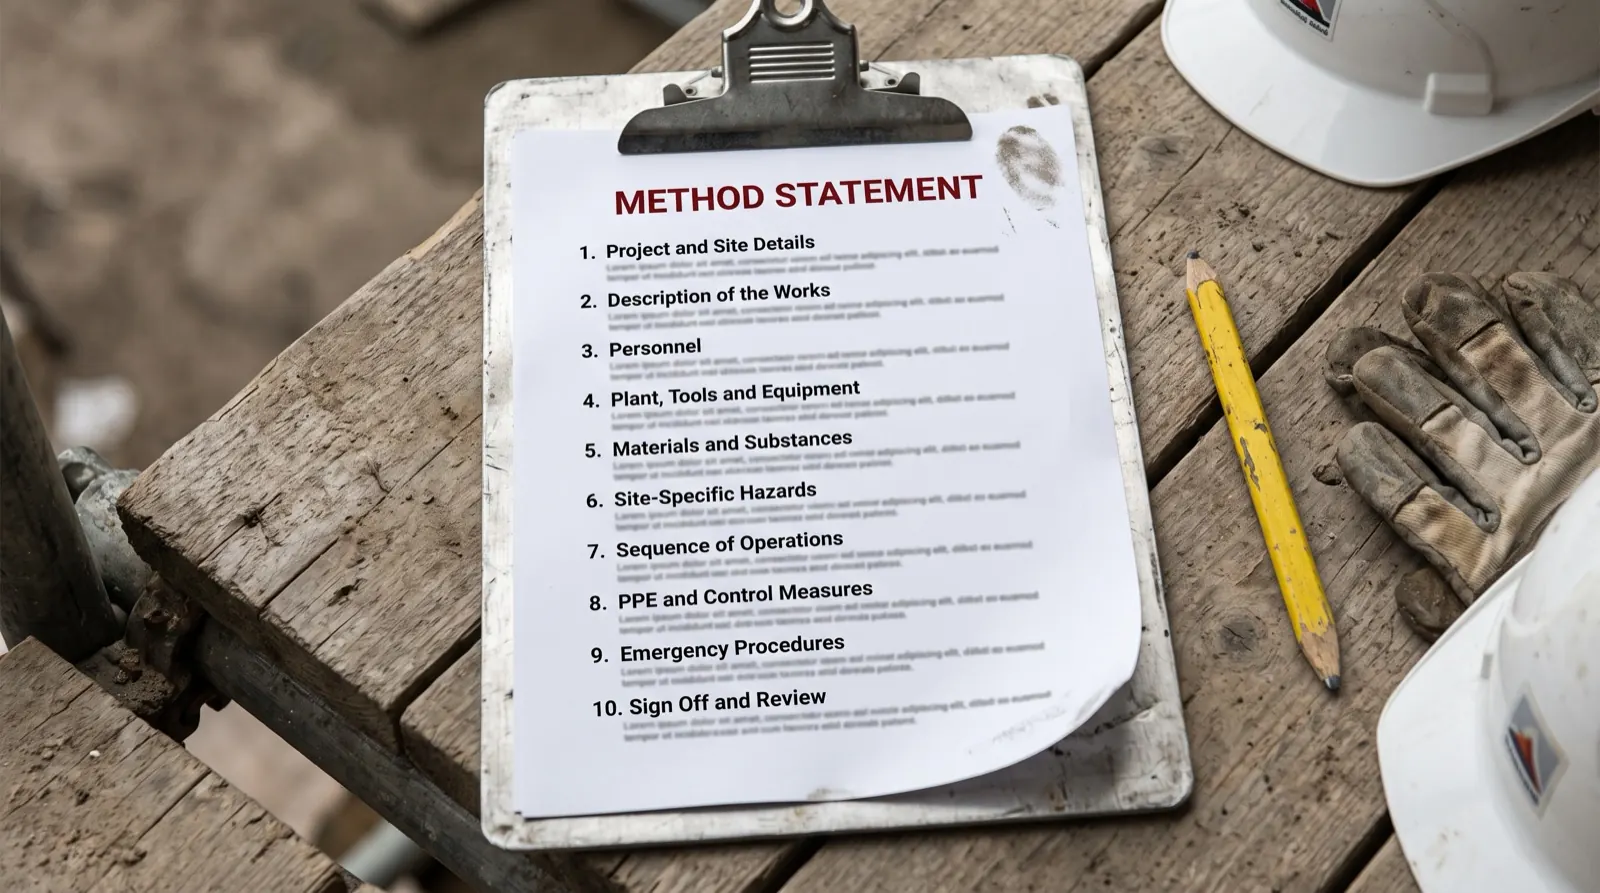
A complete method statement covers these ten sections, though the format and order can vary:
- Project and site details: client name, site address, contract or job reference, and the principal contractor if there is one.
- Description of the works: a plain summary of what's being done, in one or two sentences.
- Personnel: who's carrying out the work, their roles, and their relevant training or qualifications (for example, IPAF, PASMA, CSCS card, first aid).
- Plant, tools and equipment: everything that will be used on site, from a cordless drill to a tower scaffold.
- Materials and substances: what's being installed or used, including anything that needs a COSHH assessment.
- Site-specific hazards: what's different about this site, such as overhead cables, restricted access, members of the public or other trades working nearby.
- Sequence of operations: the numbered, step-by-step method, from setting up to leaving the site clean and tidy.
- PPE and control measures: what protective equipment is worn and what controls apply at each stage.
- Emergency procedures: first aid arrangements, nearest hospital, fire procedure, and what happens if something goes wrong.
- Sign off and review: who wrote the document, who approved it, the date, and when it should be reviewed or reissued if conditions change.
Leave one out and a reviewer may send your RAMS back for more detail before you can start.
Method Statement Example: Repointing a Chimney Stack from a Tower Scaffold
Here's a full method statement for a small, common job: repointing a chimney stack on a two-storey terraced house from a mobile tower scaffold. The client, address and people in it are fictional, for illustration only. Notice how specific each section is to this one site, and use it to see the level of detail to aim for, not as a method to copy onto a different job.
1. Project and Site Details
Client: Mrs J Hargreaves. Site: 14 Elm Street, Manchester. Contract ref: EH-0714. No principal contractor. Domestic client and a single contractor, so the client's duties pass to the contractor under regulation 7 of CDM 2015. As the only contractor, the contractor has also drawn up the construction phase plan that regulation 15(5) requires before the site is set up.
2. Description of the Works
Removal of loose and defective mortar joints from the chimney stack and re-pointing with a matching lime mortar, carried out from a mobile tower scaffold erected on the rear elevation. The stack rises from the rear wall above the patio, so the faces being repointed can be reached from inside the tower's guardrails, with the platform within the height the manufacturer's instructions allow for outdoor use.
3. Personnel
Two operatives: J. Miller (lead bricklayer, 12 years' experience, CSCS gold card) and T. Owusu (labourer, CSCS card, PASMA trained in mobile tower assembly).
4. Plant, Tools and Equipment
Mobile tower scaffold built to the EN 1004 product standard, with guardrails and toe boards on every working platform, and the platform height set so the whole workface can be reached from inside the guardrails. Pointing trowels, brick bolster, angle grinder with dust extraction for raking out, mixing bucket, wheelbarrow, rubble bags, barriers and warning signs for the area below the workface, hand-held anemometer, hard hats. No harness or lanyard is used on the tower, and no netting or sheeting is attached to it.
5. Materials and Substances
NHL 3.5 lime mortar, sand, water. Silica dust from raking out is managed using on-tool extraction and RPE (see PPE section). Safety data sheet for the lime mortar held on site.
6. Site-Specific Hazards
Rear garden has a paved patio with limited level ground for the tower base. The area below the workface, which includes a garden shed used for storage, is at risk from falling material: it is barriered off and clearly marked, and nobody uses the shed while the work is under way. No overhead cables present. Access to the rear garden is via a side gate 900mm wide.
7. Sequence of Operations
- Check the weather forecast, including the expected wind speed, before building the tower, and go ahead only if conditions allow. While the work is under way, monitor the wind speed with a hand-held anemometer, and if the average wind speed reaches 17 mph (Beaufort 4) at any point, stop work and dismantle the tower, as PASMA advises.
- Carry out a visual check of the ground and confirm the tower base plates are on firm, level standing before erecting the tower.
- Barrier off and clearly mark the area below the workface, including the garden shed, and keep anyone not working on the job out of it until the tower has been dismantled (Work at Height Regulations 2005, regulation 11).
- Erect the tower to the manufacturer's instructions using the 3T or advance guardrail method, with the outriggers fitted as the manufacturer specifies. Fit guardrails and toe boards to every working platform before use, with the platform at a height from which the top course can be reached inside the guardrails.
- T. Owusu, who is PASMA trained, inspects the completed tower in position and records the inspection before anyone climbs. While it stays up, the inspection is repeated and recorded after any alteration or anything else that could affect its safety, such as strong wind, and at least every 7 days (Work at Height Regulations 2005, regulation 12).
- Before any raking out, check from the platform that every part of the stack to be repointed, up to the top course at the chimney pot, can be reached from inside the guardrails without leaning over or standing on them. If any part cannot, stop work. If the only problem is the platform height, change it using the correct frames, following the manufacturer's instructions (never by extending the adjustable legs), and inspect the tower again before carrying on. If any part sits over the roof slope, or is still out of reach, plan other access: HSE says sloping roofs require scaffolding to stop people or materials falling from the edge, with edge protection at the eaves, at the rear as well as the front of a terraced house.
- Rake out defective mortar joints using the angle grinder with dust extraction fitted, wearing the RPE, eye protection and hearing protection listed in section 8, working from the platform inside the guardrails.
- Keep debris inside the toe boards and bag it on the platform as you go, keeping the working platform clear. Never throw or tip anything from the platform (Work at Height Regulations 2005, regulation 10). Bagged waste, tools and materials go up and down the tower only by a method the manufacturer's instructions allow.
- Mix lime mortar in small batches to avoid waste and manual handling of oversized loads.
- Point the joints with the lime mortar from the platform, inside the guardrails.
- Brush down and inspect the finished pointing, then dismantle the tower in reverse order of erection.
- Leave the site clean, remove all waste and the barriers, and confirm the patio and garden are left as found.
Why there is no harness in step 6 and no netting on the tower: PASMA's tower safety FAQ says both PASMA and HSE recommend against using a harness and lanyard on a mobile tower. Correctly fitted guardrails already give the platform collective fall protection, and an arrested fall is likely to overturn the tower. The same FAQ says you should never attach netting, boards or sheeting to a mobile tower.
8. PPE and Control Measures
Hard hats when working below the tower, safety boots at all times, gloves when handling mortar, and a hi-vis vest visible to anyone entering the garden. During raking out: on-tool dust extraction, RPE (an FFP3 mask that fits the wearer's face, worn clean shaven, as HSE's construction dust sheet advises), eye protection, and hearing protection while the grinder is running (HSE lists grinders among the tools that put workers at higher risk from noise). Eye protection and gloves when mixing and pointing, as the lime mortar's safety data sheet specifies. Fall protection on the tower comes from the guardrails fitted around every working platform: all work stays inside them, and no harness or lanyard is worn.
9. Emergency Procedures
First aider on site: J. Miller. First aid kit kept in the works van. Nearest A&E: the local hospital's name, address and route are confirmed before work starts and written on the site copy. In the event of a fall or injury, stop work immediately, call 999 if required, and inform the client. Fire procedure: evacuate the garden via the side gate and assemble at the front of the property.
10. Sign Off and Review
Prepared by: J. Miller. Approved by: J. Miller (sole trader). Date: 27/07/2026. This method statement will be reviewed if weather conditions change, if the scope of works changes, or every 5 working days, whichever is sooner.
Free Copy-Paste Method Statement Template
Use this template as a starting point for your own job. Fill in every bracket with something specific to your site: generic entries give a reviewer a reason to send your RAMS back.
METHOD STATEMENT

1. PROJECT AND SITE DETAILS
Client: [name]
Site address: [address]
Contract/job reference: [reference]
Principal contractor (if any): [name]

2. DESCRIPTION OF THE WORKS
[One or two sentences describing exactly what is being done]

3. PERSONNEL
[Name, role, relevant training/qualifications for each person on the job]

4. PLANT, TOOLS AND EQUIPMENT
[List every tool, machine and piece of access equipment used]

5. MATERIALS AND SUBSTANCES
[List materials used, note any that need a COSHH assessment]

6. SITE-SPECIFIC HAZARDS
[What is different about THIS site: access, neighbours, ground conditions,
overhead services, other trades, members of the public]

7. SEQUENCE OF OPERATIONS
1. [First step]
2. [Next step]
3. [Continue numbering every step until the job and clean-up are complete]

8. PPE AND CONTROL MEASURES
[What is worn and what controls apply, linked to the steps above]

9. EMERGENCY PROCEDURES
First aider: [name]
Nearest hospital: [name and distance]
Fire/evacuation procedure: [details]

10. SIGN OFF AND REVIEW
Prepared by: [name]                Date: [date]
Approved by: [name]                Review trigger: [conditions for review]
Filling in that template for every job takes time you don't always have, especially when a job comes in at short notice. If you'd rather not start from a blank page, our method statement generator drafts one in minutes: you describe the job in a chat, answer its follow-up questions, then check and edit the draft before you download it.
Common Mistakes That Get RAMS Rejected
Use this list as a checklist before you hand your RAMS over. Each gap gives a reviewer a reason to send a method statement back:
- Generic wording that could apply to any site. If your document mentions "uneven ground" but the job is on a flat driveway, a reviewer may assume you never actually looked at the site.
- Mismatch between the risk assessment and the method statement. If the risk assessment calls for dust extraction and a mask but the method statement never says at which step they are used, a reviewer is likely to pick up the inconsistency.
- Missing site-specific detail. Overhead cables, neighbouring properties, restricted access, and members of the public all need to be named, not implied.
- No numbered sequence. A block of prose describing the job is not the step-by-step method reviewers usually expect to see.
- Out-of-date qualifications or missing personnel details. If a named operative's card has expired, or the document doesn't name who's actually on site, a reviewer may send it back.
- No review date or trigger. A method statement with no plan for updating it if conditions change looks like a document that was written once and never looked at again.
- Copy and paste from a previous job. Leftover client names, wrong addresses, or references to equipment that isn't being used on this job can show a reviewer the document wasn't written for this site.
No tool fixes every item on that list: you still need to check names, cards and site details yourself, and check that the method statement matches your risk assessment. But when you start a method statement in AI RAMS, the chat asks follow-up questions about the job before it drafts anything, so you are not filling in a blank page from memory.
Frequently Asked Questions
Do I need a method statement for a small domestic job?
Usually not by law, at least not under that name. HSE says method statements are not required by law for most construction work. What the law does require is that you assess the risks of the job and, for construction work, that there is a construction phase plan, which for a small job HSE says does not need to be complicated. Some work must also be planned in writing. CDM 2015 requires the arrangements for demolition or dismantling to be recorded in writing before the work begins (regulation 20), and HSE says the same for structural alteration. Any work with asbestos needs a written plan of work (Control of Asbestos Regulations 2012, regulation 7). Beyond the law, clients and principal contractors often ask for a method statement before you start. For a quick answer on your own job, run the 30-second check for small jobs.
Who is responsible for writing the method statement?
CDM 2015 does not mention method statements, and HSE says they are not required by law for most construction work. What CDM 2015 does require is that every contractor plans, manages and monitors the work they and their workers carry out so that, so far as is reasonably practicable, it is done without risks to health and safety (regulation 15). If you are the only contractor on a project, the same regulation requires you to draw up a construction phase plan, or have one drawn up, before you set up the site. A method statement is the usual way to show how you have planned the work, and clients and principal contractors often make one a condition of the job. If you're a sole trader or small business, the duty to plan the work sits with you, even if a principal contractor reviews and approves the document.
Can I reuse a method statement from a previous job?
You can use a previous document as a starting point, but every method statement must reflect the actual site and conditions for the current job. Reusing one without updating the site-specific hazards, personnel and sequence gives a reviewer an obvious reason to send it back.
How long should a method statement be?
Long enough to cover all ten sections properly, and no longer. A method statement padded out with generic health and safety text is not more thorough, it's just harder to read.
What's the difference between a method statement and a work plan?
A work plan or programme is about timing and scheduling. A method statement is about how the work is carried out safely. They often sit alongside each other, but a method statement always needs to include the hazards, controls and PPE, not just the order of tasks.
How quickly can I put a method statement together?
It depends on the job. A short job with one or two people and familiar equipment is quicker to write up than one with several trades, awkward access or hazardous substances. With the AI RAMS method statement generator, our own tool, you describe the job in a chat, answer its follow-up questions and get a draft method statement in minutes, then review and edit it before sending it out. Creating, previewing and editing are free; downloading is paid.
Writing Your Next Method Statement
A method statement that covers all ten sections, is specific to the site and matches your risk assessment gives a reviewer fewer reasons to send it back. The template above is free to copy and use. If you'd rather start from a draft, you can try AI RAMS for free: describe the job, then check and edit the method statement it drafts. Creating, previewing and editing are free and no card is needed to start; you pay only when you download: once per document, which unlocks its downloads, or with Pro for unlimited downloads.
Ready to try AI-powered RAMS?
Create, preview and edit documents free, with no card needed. Pay only when you download.
Start free